Xilinx Zybo zybo_base_system example
Xilinx Zybo zybo_base_system example
- ProjectGuide.txt 파일 내용을 참고로 하여 진행.
To create a workspace that uses these files and then program the ZYBO with the demo over JTAG, do the following:
*WARNING* This demo draws more power than can be supplied by a typical USB port.
You must power the ZYBO from an external power supply to ensure that it runs properly. Attempting to power the ZYBO from a computer while running this demo may cause the computer to crash.
1) Open an empty workspace in Xilinx SDK 2013.4. => Xilinx SDK 2018.2로 테스트.
2) Create a new hardware platform specification. Target the system.xml file in the hw_platform folder
File - New - Project...
Xilinx - Hardware Platform Specification
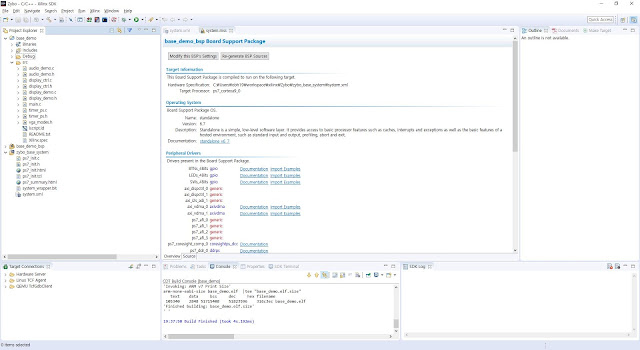
3) Create a new Application project and name it base_demo. Create a new Standalone C Board Support package for it. Select "Empty Application" as the type.
4) Copy the files from the base_demo folder included with this package into the base_demo/src folder of your new Empty Application project. Overwrite lscript.ld.
File - Import..
General - File System

5) The project will now automatically build, and base_demo.elf will be created.
- ProjectGuide.txt 파일 내용을 참고로 하여 진행.
To create a workspace that uses these files and then program the ZYBO with the demo over JTAG, do the following:
*WARNING* This demo draws more power than can be supplied by a typical USB port.
You must power the ZYBO from an external power supply to ensure that it runs properly. Attempting to power the ZYBO from a computer while running this demo may cause the computer to crash.
1) Open an empty workspace in Xilinx SDK 2013.4. => Xilinx SDK 2018.2로 테스트.
2) Create a new hardware platform specification. Target the system.xml file in the hw_platform folder
File - New - Project...
Xilinx - Hardware Platform Specification
3) Create a new Application project and name it base_demo. Create a new Standalone C Board Support package for it. Select "Empty Application" as the type.
4) Copy the files from the base_demo folder included with this package into the base_demo/src folder of your new Empty Application project. Overwrite lscript.ld.
File - Import..
General - File System

5) The project will now automatically build, and base_demo.elf will be created.
6) Attach J11 (Labeled PROG UART) of the ZYBO to your computer, a 5V power supply to J15, and set the power source to Wall with JP7.
Set JP5 to JTAG. Turn the ZYBO on.
7) Connect to the ZYBO in a terminal program with 115200 Baud, 8 data bits, 1 stop bit, no parity (This project was tested using TeraTerm 4.79)
=> putty를 사용하여 테스트.
8) In Xilinx SDK, select Xilinx Tools -> Program FPGA, then click program. Wait for the ZYBO to program (DONE LED will illuminate when this has completed)
9) Right click the base_demo project in Xilinx SDK Project Explorer, and select
Run As... -> Launch on Hardware (GDB).
The demo will now be running, and can be controlled from the terminal program.
참고) Jumper가 QSPI 상태인데도 Program FPGA & Launch on hardware (GDB)가 되었다.


댓글
댓글 쓰기